Followers (I'd love to have you join)

Tuesday, November 9, 2010

Cricut Circle Magazine Challenge – November 2010

Cricut Circle Magazine Challenge – November 2010


The challenge was to make an ornament that could hang from the Christmas tree. It needed at least 5 circuit cuts and some other Provo craft tool.

This is a 6 cut ornament. Three long ornaments cut from the imagine Snow Angel cart along with three inner circle designs. I flood-filled the blue-sided ornament, as there was no pre-designed one in a third shade. I handed colored over/embellished the existing designs with lots of glittery, shiny tools. The sparkle does not show very well in the photos.

Items Used:
Plain white card stock
Imagine machine
Snow Angel cartridge
I-Rock (3 gems - hard to see in photo)
Glitter pen and red embossing pen (love these pens I got from the CK convention)
Crystal stickles
Pearl, red and emerald smooch
Various colored pens/markers
Glue dots
Pop-dots
Sparkly brown ribbon

There you have it! This is  not  as cool as some others I have already seen posted on the blog – but this was soooooo easy to make with my wonderful Imagine!

Monday, November 1, 2010

A Halloween and a Fall Layout

 Trick-or-Treat


The spider was cut from the Designer Calendar cart and her head is an apple shape from the Celebrate with Flourish cart -- pop-dotted for depth. The spider has 2 red brads for eyes, a scrap of white for fangs, and a mini pom-pom for her egg sack. She is covered with paper glaze to get the shiny look. I used the same Celebrate with Flourish cart for the title “Trick-or-treat”. Various sizes of a card base from A Child’s Year were used for the photo mats. The layout was topped-off with brads and spider ribbon. I belive the patterned paper is by Creative Imaginations.

Happy Fall Y’all!
This layout was originally for a challenge on the cricut circle board a month or so ago, but I was not able to post it in time. .


I used the Old West cart for the nice box lettering. The scarecrow, tree, and fall leaves all came from the Celebrate with Flourish lite cart. A jack-o-lantern was cut from a sheet of paper and used for the scarecrow’s head. The moon is just a plain circle, cropped. A “ribbon hole” punch was used on the layered rectangle frame and a soft sage green ribbon was weaved thru for the final touch. Sorry, I do not recall who the fall patterned paper is by.

Sunday, October 31, 2010

ABC Animal Book (Deployment gift)


I have a neighbor who is very sad about going TDY (Temporary Duty) for 6 months to Afghanistan (no they really don’t seem to be pulling out). She will miss all the holidays and birthdays for her 3 small children (ages: almost 1, soon to be 3, and 5 in spring). I wanted to do something to help her stay in touch with the kids.


I immediately thought of little cute cards for her to send home to them. I finally decided on a card a week, and thought that ABC card would be fun. I told her, she can tell the kids, she will be home before “Z”. I wanted the little ones to be able to see all the little animal cards mommy was sending home so I made up an album and place corner tabs for every card with a little label that said the name of the animal and the letter it represented. The front of the book says “How may weeks until mommy is home? Count the missing animals to find out” .


My hope is that it will be fun way for her to keep in touch and a cute way for the children to count down the weeks until she gets home. I also added a birthday card for each child and card for each holiday she will miss.

With all the work I put into this, it surprisingly only took 5 days from start to finish. I packaged all the cards up in a little box for her to pack in her bags, and gave the kids (and dad) the Blank Album to put the cards in as she sends them home. I left plenty of space for pictures of mommy in th front and back of the album  -- so the kids can “see her” as they look at all the cards she sent to them. I was going to pre-pay the postage for each card but have since found out that the military covers the coast of postage for our deployed troops.

I cut all the animals at what ever size each would have a good fit on a 4X 6 card.

I used only five cartridges on this project: Animal Kingdom, Create-a-critter, Designer Calander, Everyday Paper Dolls, and Zooballoo.


I printed the cover using Microsoft office and I used old sticker letters to place in the corner of each card. I also embellished come cards with googol eyes, stickles, brads & gems. I added a note of caution “not safe for children under 3” but hope it will be a book that the kids will share with an adult.

Saturday, October 30, 2010

Total Robot Birthday Party

My son had a robot birthday ...becuase he liked my "new" Robotz cartridge so much. 
All items for this party were cut with the Robotz cartridge and Design Studio

                               
 THE INVITATIONS
Of course I had to start with these.


The robots were cut at 5 ½ inches high.  I glued the finished robots on cardstock cut to note-card size and put all the party info on the back. 

The patterned paper is from The Paper StudioA Boy’s Universe.


               PARTY FAVOR


Next I started on the party “favor” activity -- A 3D robot.

I made all the main body parts in multiple solid colors of cardstock and used the same Paper Studio patterned paper stack for the “feet”. I cut body parts for twelve - 3D robots at max size. The head was the largest piece. I cut it at an angel to get them max size for a 12 x 12 mat cut at 8.4 inches high and 12.3 inches wide using Design Studio.


The finished robots stood at 10 inches high
Once all pieces were cut, I scored at all the score lines and placed covered photo splits on all tabs of each body part. Yes, I used a lot of splits, but this made it much easier for the children to put the robots together.

I put all the little parts in baggies so the kids could just pick and be ready to start.

   
                   PIÑATA
We needed a matching piñata so I took a pre-made “Transformers” one and replaced the head with the same 3D head used for the other robots. I cut the head bigger on a 12x24 mat. Sorry, I don’t know what size I cut this at.


                          BIRTHDAY CARD


The celebration would not have been complete without the traditional birthday card. Here is the pull-up card I made using one of the leftover robots from the Thank you cards below.

Great directions and a vido for a Pull-up card can be found at http://www.splitcoaststampers.com/resources/tutorials/freestandingpopupcard/

                                                  THANK YOU CARDS
After I cut and assembled the robots, I sent the "doors" thru the regular printer to say "Thank You".   My son signed his name on the inside of the the window. 
TIP:  A good trick for printing on your cuts is to print on a blank sheet of plain paper first.   Then position your cut on top of the print, tape it down, and reprint.
I loved having the Thanks you cards done in advance – I was able to pass to the kids (or moms) as they were leaving the party.

BREAKFAST

We finished of the slumber party with a donut robot for breakfast.


            SCRAPBOOK   LAYOUT
 Of course, I had to do a Robot  layout for the scrapbook.


 This idea was scrap-lifted from Monique Griffith at http://monkeydoodlecricut.blogspot.com/ .
She has just beautiful layout kits for sale.


Overall this party was row-bows of fun.
TIP:  I recommend, if you plan on making you own “put-together project” similar to this, give yourself several weeks to prep -- that way you only have to do a little at a time.

Thanks for looking and God bless.

Cricut blog’s monthly challenge - October

Here is my entry for the Cricut blog’s monthly challenge.


October’s challenge was  CELEBRATING CREATIVITY

We were to create a scrapbook page or a home décor project. I choose a home décor piece. I thought it should be a big deal for the wonderful prize they are giving away – A Scrap Box.

The project needed to:
1. Include at least 2 cuts
2. Use the shadow feature
3. Use patterned paper
4. Embellish at lease one of the cuts

I used Hello Kitty font cart for all the lettering and welded the words in design studio. I also used the shadow feature for the lettering. The butterflies I cut from the Storybook cart.
For the patterned paper I printed full sheet on my new Imagine using the patterns on the Imagine More cart.
I used gems and Smooch on the butterflies.
The frames were just $3 each from Wall Mart.  I used some nice golden fall colored ribbon to finish it up.

 It looks great in my kitchen!


Enjoy and God Bless!

Thursday, October 21, 2010

Here is a little Halloween Card I wanted to share.


The hand opens, not the whole card. The inside says “Eye, just wanted to thank you”. This could also say “Eye wanted to invite you…” or “Eye wanted to say Happy Halloween”, etc... Whatever suits your fancy.

I did not have a scary Halloween Hand - I didn’t freak -- I just wield one with the wonderful Design Studio. I used A Childs Year for the hands. I wielded two hands together (one was flipped)  --this way the hands would fold open to present the eyeball. I turned and wielded tiny ice cream cones of various sizes (from Designer Calendar cart) to make the creepy fingernails and warts. I colored the fingernails with a black marker (inside and out), painted the tips with siren Smooch (for the blood-look), and topped them off with Paper Glaze, for that shiny look. I drew some details on the hands and did a little shading with ink.

For the eye--- I actually cut the colored circles with the Cricut Imagine – I got the perfect shade of blue and off-white this way. I glued the circles together, used my white opaque marker for “light”, and added tiny bloodshot lines with a red pen. I topped of the eyeball with the Paper Glaze, to make it look wet. Lastly, I pop-dotted the eye on the inside of the hand.

The little spider was also cut from the Designer Calendar cart. I added a pop-dotted circle head on him and covered him in paper glaze, as well,  and used the same Smooch (as on the fingertips) for his red eyes. He is dangling from a piece of dental floss.

DETAILS & SUPPLIES
This is a 4.5 x 6.5 card.
Background paper is from DCWV – La Crème Mat Stack
Each hand cut at W4.45 x H4.76
Red accents - siren Smooch and a red Sakura Glaze pen
Cricut Expressions
Cricut Imagine
Cartridges: A Childs Year and Designer Calendar
Pop dots
Paper Glaze
Open card stock (white, “witch” green & black)
Glue and Adhesives very

I am veryt pleased with the results!
Happy Hunting’s, God bless, be safe & enjoy the season!

P.S. I AM LOVING THE CRICUT CIRCLE BLOG!!!

Thursday, October 14, 2010

My Cricut Circle Blog Weekly Challange Entery

Hi All! Long time no post, But I am back in action!!!

Here is my entry for the Circut Circle Blog Weekly challenge.


It was: Weekly Challenge #2: THINK PINK!
Use Pink, Ruffles, Scallops, Flourishes, Glitter and Jewels ( incorporate any 3 on your project)
In honor of Breast Cancer Awareness month we wanted to do an ultra girly challenge to celebrate the strength of girls. Create a project of your choice (card, scrapbook page, home decor project, . . . the sky’s the limit!). Project must be newly created for this challenge and must include atleast 2 cuts to qualify. This challenge is open to Cricut Circle Members only. Submit your entry using the InLinkz tool found at the bottom of this post. You must submit a project to be entered into the drawing. Entries are due by 11:59 pm MST on Thursday, October 14th, 2010.

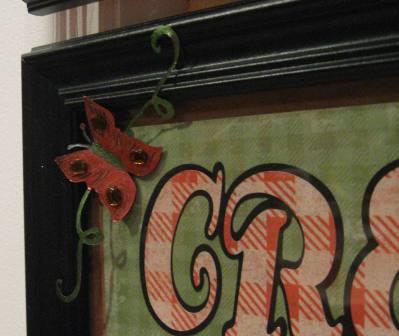
While my layout is not Pink, it does have flowers/flourish, glitter, jewels, scallops & ruffled ribbon. That’s fairly girly wouldn’t you say?

Anyways – this is a page I created today for the challenge – although we got our dog 5 years ago – I am, however slowly, working on my Album for 2005 - UUUUAAAGGGGGHH!!!!

I used the following cartridges:
A Child’s Year - for the frames, silhouette of dog & boy, & for the scalloped nameplate
Plantin Schoolbook – for the lettering
Create-A-Critter – for the words “Ruff Ruff” and the dog bowl
And I am so excited to say I also used the Imagine cartridge Best Friends – for the large checkered background pattern and elegant shape!

Other supplies:
Patterned paw print paper - sorry don’t know where I got it
Open Card stock in white, black, & red
Red ruffled Ribbon
Red cord (on Collar)
Jewels – one clear and 3 red (one collar & center of flowers)
One silver brad
Flowers – black & white ones are Making Memories brand & the three white layered on top are from a forgotten supply
Also, I used my white opaque pen and my crystal glitter pen
Adhesives – Glue Dots, Scotch scrapbooking, Xyron, and my pink Herma Vario EK tab runner

HOPE YOU ENJOY!

I have a LOT of summer/fall posts I’ll be adding in November so check back then!

As always, Happy Scrapen’ & God Bless!

Wednesday, August 11, 2010

Update on Weight

So here is my weight tracker...

I can not figure out how to have the cute little "tracker" update.  So I am posting an update here -- My new weight, as of 20 October, is ...145.5!  I am down 11.5 lbs!!!! I hope to lose 5 more by Thanksgiving. 


Add caption
 

Nothing tastes as good as thin feels!!!

Monday, August 2, 2010

Bloom Layout

This is a 2-page layout I made from a card I created for a RAQ’s card challenge (Cricut Board). I made the card too big, but I put a lot of work into it so I still wanted to use it. I cut the card apart and used half on each page. This layout is of my boys in the Texas wild flowers.


I used Design studio to wield flowers on a screen (Cricut does have a cart with a similar flower screen on it – so I worked to hard on this one.)

I use some puff paint for the flower centers.

You can see the card would have been about 10 inches (to big to make an envelope for).


Carts I used: Just Beacause Cards, Graphically Speaking, Walk in My Garden, Cursive 101

Friday, July 30, 2010

Fathers Day Cards

Here are the cards I created for Father's Day 2010
This was made with Lifes a Beach cart


 Both made with Celebrate with Florish Cricut Cart


This one made with Everyday Paper Dolls cart

Birthday "Tweet" Cards

Here are two similar Birthday Cards I made.  One is for a Dear Friend and the other for my  DML. 
They are popped and the bird houses swing back and forth.


Inside tweet tweet: - "Hope Your Bird-thdays Very Sweet"
Inside Hi Chick:     - "Hope Your Bird-thdays Very Tweet"

What I used:
Create a Critter Cricut Cartridge

Mini Mosaic embossing folder for the bird houses

Patterned papers are both from DCWV Premium Stacks Citrus Matstack

One brad each and 2-4 little chain links on top of bird houses

Bird faces - Stamps from Peachy Keen - PK-754 Critter Faces SET A medium (very cute)

Various inks
Blue gems for eyes


Note: Please don't ask what size I cut stuff at - I use Design Studio and just make it at a size that fist the card and design I plan to use.